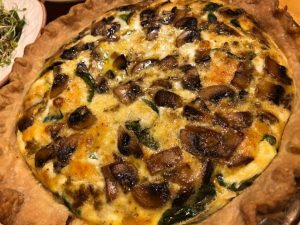
Five Feline Farm Foodies

We are foodies.

Our farm is all about food. Growing food, planning for food, selling food at the Farmer’s Market or our own Mercantile, preserving food, and yes, of course eating food.

During these dark, cold Winter days we continually look for ways to improve our food production. We plan for the growing season and the basement holds hundreds of tiny plants waiting for warmer weather. Tomatoes, peppers, asparagus, rosemary, basil, onions and even flowers for our pollinator friends are beginning their lives in the grow stations.

Our current food supply is sourced as much as possible from the freezer and pantry. Rows of gleaming jars full of home canned sauces, salsas, pickled peppers and broths line the pantry while baggies and containers of frozen fruits and sauces pack the freezer. All of these inspire a multitude of meals.

Once Spring and Summer finally arrive, we will have access to fresh vegetables mere steps from the front door. A short stroll out the back door lies the primary herb garden ready to add an abundance of flavor to any dish. Many of these fresh herbs and vegetables will make it to the Farmer’s Market this summer.

It’s a foodie’s paradise.

How To Revive Leftovers

Do you sometimes look in your refrigerator at meal time and all you find are bits of things left from other meals?

Maybe you find a cup of spinach, four mushrooms, and the end of a block of cheese. What would you do with these?

This is the point where my creative juices begin flowing. I love to take random ingredients, even actual leftovers and turn these into a meal.

A few nights ago, I did find those ingredients listed above languishing in the bottom drawer of our refrigerator while I was trying to decide what to fix for supper. (Yes, it’s supper in this part of Illinois.) My synapses began to fire.

I typically keep homemade pie crust in the freezer portioned in single pie crust size. It will thaw in one minute on 40% power in the microwave. Eggs and milk are staples in this house so I had all the ingredients for a quiche.

Here’s the basic quiche recipe, including pie crust from my book “Simply Delicious”. For even more recipes like this, get your copy here.

For a 9 inch quiche

  • 1 pie crust (can either be home made or store bought)
  • 5 large eggs
  • 1-1/2 cups half and half
  • 1 to 2 cups of vegetables, meat and/or cheese, finely diced
  • salt and pepper to taste

Pie crust is simply made by mixing 1 cup flour and 1/2 tsp salt. Cut in 1/3 cup shortening. Add water one tablespoon at a time until the dough comes together into a ball cleaning the sides of the bowl. Handle as little as possible, kneading only 2 or 3 times to make a smooth ball. Roll into a circle larger than the pie pan and transfer the crust into the pan. Prick the crust or use pie weights to keep the crust from puffing and pre-bake for 10 minutes in 375º oven.

Evenly distribute vegetables, meat and cheese over bottom of crust using a maximum of 2 cups of filling. Mix eggs, half and half, salt and pepper to taste. Pour over the fillings being careful not to overflow the crust. Bake at 375º for 30 to 40 minutes until the eggs are set. Let cool slightly and slice into wedges for serving.

What’s in your fridge?

If you have random bits of leftovers in your refrigerator or pantry and would like to know what I would create, just email, message or tweet and I’ll give you some ideas.

Until next time…

A Quick and Easy Bread

Yeast breads are delicious but unless you have a 5 Minute a Day bread dough stored away in the refrigerator, planning ahead is required. Most of the time, I want something on the table in under an hour. There are several quick bread options, but lately I’ve been making Popovers.

Rich and eggy, with an open center just right for butter and a dollop of jam, popovers may be the easiest possible bread to make. Here’s how I do it:

Popovers

2 eggs

1/2 tsp salt

1 cup milk

1 cup flour

Preheat oven to 425º. Lightly grease a six cup popover pan or use a nonstick pan.

Add eggs, salt and milk to blender. Mix briefly. Add flour, mix for 30 seconds. Scrape down the sides of the blender, mix again for 15-20 seconds or until all flour is incorporated. Distribute batter evenly in popover pan, filling each about 1/2 full. Bake for 40-45 minutes until puffed and browned. Remove from oven and immediately insert knife blade into side of popover near the top to vent steam. Serve with butter and jam.

The popover pan is essential. It is similar to a muffin tin, but has much deeper cups to allow the batter to climb up the sides of the cups and “pop over”.

Try some for yourself.