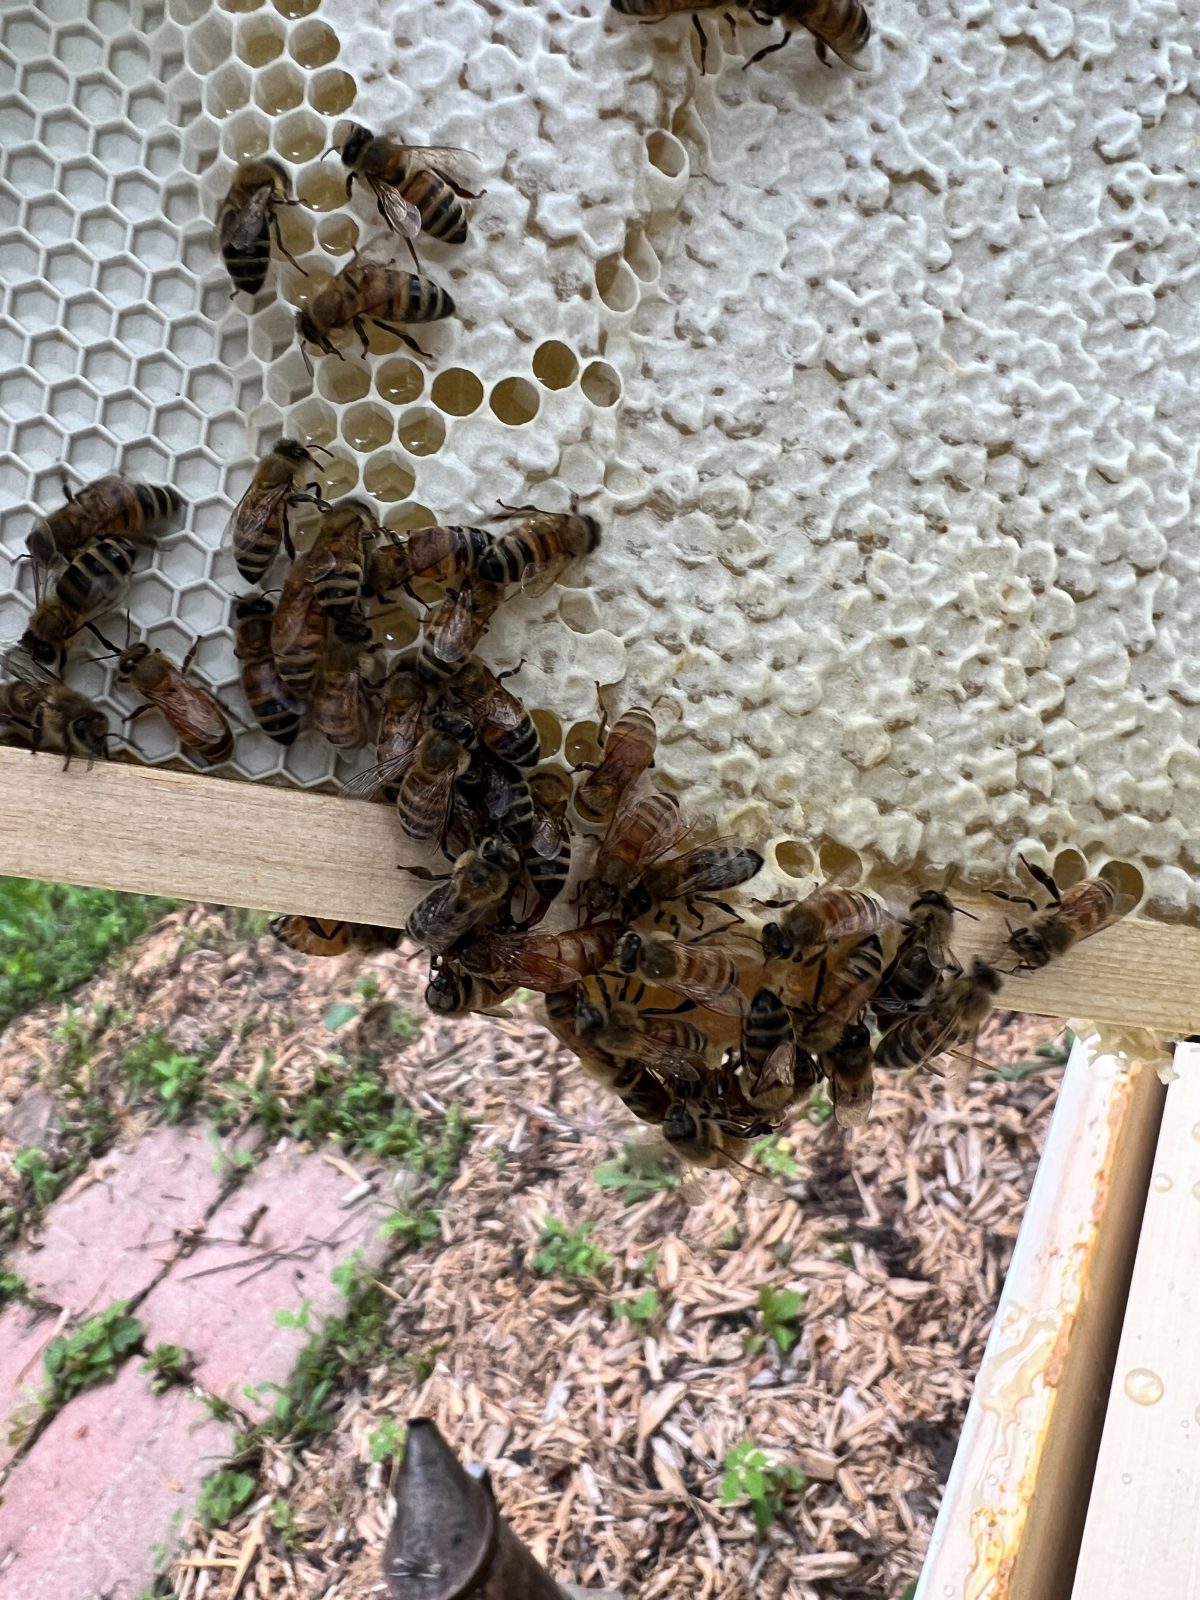
Understanding Localized Vs. Systemic Reactions: My Journey

There is a distinction between an allergic reaction to a bee sting and being allergic to bee venom. It sounds like a minor semantic difference.

It is not.

Back when honeybees were an integral part of our farm, many people would respond, “I’m allergic to bees.” What they meant was, that when stung, the area around the sting would swell, itch, and probably hurt. Depending on the location of the sting and how much swelling would result, they may have required medical treatment, for example, if an eye swelled shut.

Most people can treat a honeybee sting at home with ice and a topical anti-itch cream.

I found out the hard way what 3% of adults mean when they say they are allergic to bees.

First, let me say that over my lifetime, I’ve been stung many times by many insects. Wasps, yellow jackets, hornets, and honeybees. While working in honeybee hives, I would get stung once or twice a year.

Always with the same reaction—an apology to the honeybee who just lost her life trying to protect her colony, remove the stinger, ice the area, and take an anti-histamine for itching if necessary. Most of the time, I didn’t even need the ice or drugs.

Everything changed on July 21, 2023.

We needed a new queen for one of our colonies and found one immediately available three hours away. One benefit of retired life is the flexibility to take off on a moment’s notice to run such an errand. Along the way, we stopped for a nice big breakfast, then headed on to the bee farm.

Arriving at the farm, we had to walk past a couple of beehives to access the store. I wasn’t afraid. I just didn’t linger in the bee flight path.

What I didn’t know was one critical piece of information.

The owners had just completed a full inspection of these hives, which agitated the bees. Guard bees were on high alert for further intruders.

They interpreted our stroll past their door as an unacceptable act of aggression. Bees came after both of us and we walked in separate directions away from the hive trying to put enough distance between us and them, to diminish their perception of the threat.

The bee following me was relentless.

She kept buzzing my head and landing on my hair. My mistake was what I intended to be a gentle brushing of the bee away from my hair, Miss Honeybee thought was swatting at her. She dug in, rear-end first, and let go with a full dose of venom into my scalp. I saw her tumble to the ground.

Well, shoot.

Donna removed the stinger from my head and I went back to the shop to pay for the queen. That was the entire purpose of the trip, after all.

While waiting for the owner to swipe my credit card, I noticed my palms and the tops of my feet were itching. Odd, I remember thinking.

Within ten minutes, we were back on the road, heading for the interstate and the 3-hour drive home. I recall saying I didn’t feel very good. My stomach was upset, and I was beginning to sweat. Donna handed me a dissolving allergy tablet.

Looking back, there are so many things I wish I would have done differently.

I wish I would not have swatted the bee.

I wish I would have stopped before getting on the interstate.

I wish I would not have been three hours from home.

I wish I would have pushed the little red SOS button in the new vehicle.

Within a mile of entering the freeway, I had to pull over. We were on a slight curve about to enter a construction zone and the shoulder was littered with debris. Semi-trucks whipped by and I could not get out of the car.

None of that mattered.

Donna tried to find whatever she could to contain the onslaught. Violent vomiting threw breakfast all over me and the new car. A couple of our new, tidy, pretty-patterned, reusable, and packable grocery bags were sacrificed. I pity the person who picked up litter on that stretch of highway.

Feeling somewhat better, although now sporting red hives from head to toe, along with the remains of breakfast, we headed home.

Donna tried to find a change of shirt for me at a couple of gas stations (the first stop had an apparent drug deal happening behind us, so we hurried on to another station). All she could find was wet wipes and water. There were no clean shirts to be had at the gas stations. Her conclusion: “That’s the last time I shop for clothes at BP.”

We discussed finding a hospital and a truck stop where I could shower. Hospitals were an option on our route, but not the shower. I just wanted to be home.

Somewhere in the recesses of my mind, I knew I needed medical attention, but I wanted a shower more than anything, and it felt like the crisis had passed. I was filthy; the car was filthy, and the queen needed to get into her hive.

After three long hours, we arrived home and did all the things—shower, clean the car, and install the bee.

When I finally went to the walk-in clinic, I learned that any future stings would likely cause an even worse reaction. Donna had Googled anaphylaxis on the drive home—my symptoms already reached “severe” status. Worse than that was horrifying to contemplate.

I credit the bit of antihistamine from the dissolving allergy tablet for reaching my system enough to keep my airway open. Sitting in the clinic was when I truly appreciated the seriousness of what had happened.

Life changed for us that day.

We are out of the beekeeping business. We both have a keen awareness of the ability to summon anytime and anywhere through On Star if we only push that little red SOS button. The car is now loaded with wet wipes and an emesis bag for emergencies.

And I carry an EpiPen.

Decluttering Financial Records

If you have been listening to our podcast Farm Chatter over the past few weeks, you know we have been focused on ridding the house of clutter. (If you haven’t heard one yet, check out Episode 102-The Declutter Report.) One of those decluttering tasks was to purge old financial records.

Does anyone else have trouble throwing out bank statements?

Paid credit card statements?

Old utility bills?

How about the maintenance agreement on a product you no longer own? Ok, that one is easy.

But those old financial records are a different matter.

Set Up Your Own Rules

Use a rule that makes sense to you about your financial records.

Our general rule is to keep tax returns forever; paid bills, bank statements and tax supporting documents for 3 years. Other things like maintenance agreements, operating manuals, etc. are only necessary while we own the item.

Everything else found in the bottom of a box in the back of a closet can go.

Who knew so much paper could accumulate?

After the financial record purge, a 3 foot high mountain of paper was stacked in the floor. No one wants to just throw these in the landfill. What if a page with sensitive personal data blows across the road to someone’s house?

Out comes the shredder.

We discovered after about 20 minutes of constant use, the poor little cross cut shredder would overheat. It took about 3 days of on-again, off-again shredding to get through the pile. Now the 3 foot high mountain is a huge stack of trash bags full of teeny-tiny, itty-bitty pieces of paper.

Now what?

These could go to the landfill now without fear of personal data scattering to the winds. But we feel an obligation to recycle.

This paper is now getting a second life around the Farm. It can go directly into the compost pile but can also be used in other ways.

How about in the bottom of transplant pots for new little seedlings?

It can also be used as a soil additive in raised beds to help with water retention. A 2 foot by 8 foot raised bed may accommodate 2 or 3 gallons of shredded paper. Pro tip: add a little at a time and mix thoroughly through the soil. Wait a week, then add more if necessary.

What can you do?

—Even if you don’t have such a mountain of paper to shred, you can use what you have. You can always wad up newspaper in the bottom of a flower pot before adding soil and plants. This helps reduce the amount of soil needed, makes the pot lighter weight (especially useful when re-potting large plants) and assists with water retention.

—Always think about recycling whenever possible.

For more information or tips about things to do at your place, follow us on Facebook, Twitter, or Instagram.

Fall Garlic Planting

Hardneck Garlic Bulbs

Walk into any decent Italian restaurant and take a deep breath. That warm spicy aroma tingling your nose is quite likely garlic. The incomparable deep flavor makes Italian dishes renowned, but also enhances any number of other recipes.

You can bring this culinary delight into your own kitchen through bulbs of garlic purchased at a box store, often imported from China, but why do that when garlic is so easy to grow?

If you are interested in growing your own garlic, now is the time to order. It is somewhat counter-intuitive, but garlic is one of those plants designed to spend winter nestled in the cold earth. 

How to Choose Garlic

There are two basic types of garlic and a number of varieties within those types. Like any other plant, the specific varieties have different advantages in terms of flavor, storage, etc.

Hard Neck Garlic

These bulbs of garlic are different from the kind you normally find available in the store. The bulb forms a hard center stem that grows up through the bulb to support the leaves. When you open the bulb, there are typically 6 or 8 cloves of garlic around this center stem. The cloves are full and large. Varieties include Music, Bogatyr, and German Red.

Soft Neck Garlic

This garlic does not form the hard center stem. Softer leaves shoot out of the middle and many cloves form around this center. The outer cloves are reasonably sized with smaller ones near the center. Even the outer cloves do not attain the size of the hard neck types mentioned above. Varieties include Inchelium Red and Burgundy.

Soft neck garlic can be stored in braids by leaving the stems attached and braiding decoratively to hang.

Planting

After you receive your garlic bulbs, either through a mail order supplier or somewhere local, do not remove the papery outer cover. Store the bulbs in a cool, dry place until ready to plant, then peel off the outer covering and separate the cloves, leaving each clove cloaked in its paper cover. 

Choose a sunny location that is well drained with rich soil.  You will need 6-8 inches of space per plant. Push each clove into the soil approximately 2 inches deep with the pointed end up. Cover with soil and mulch.

In Central Illinois, mid-October is a typical planting time, with harvest the following June.

If you have questions about planting garlic or any of the other crops grown at Five Feline Farm, you can contact us through social media (Facebook, Instagram, Twitter) or email. In the meantime, be sure to check out our online Mercantile for other available products.

How To Remove Seeds

Do you like seeds in your jam?

I’ve only met one person who reported liking seeds in her jam. In fact she said “the more the better”. But most people seem to prefer seedless jam. The same is true for tomato sauce. No seeds.

How do you remove all those tiny seeds?

Blackberries, raspberries and tomatoes all have bothersome seeds. I have two different methods for removing seeds. The choice of which to use depends on the final product.  

For blackberry or raspberry jam, I use a Juice Mate.

Juice Mate

This hand cranked strainer has a spiral inside that pushes the berries through and squeezes it against a fine mesh strainer. It will remove almost all seeds of these berries. The resulting pulp and juice makes a fine seedless jam.  

The Juice Mate also works wonders for tomato juice. After washing, coring and quartering the tomatoes, the Juice Mate will remove seeds and skin.

Juice Mate showing screen

One downside to this system is the cleanup, but here’s a tip: take the screen outside and use the garden hose for the first rinse. The power of the hose blasts out the stuck seeds allowing for an easier wash back in the house.

What about tomato sauce?

When making tomato sauce, I want the meaty sections of the tomato intact and  an occasional seed is not as much of a concern. After removing the skin, I cut the tomatoes in half and drag out as much of the seed section as possible with a finger. Sometimes with juicier tomatoes simply squeezing the tomato half does the trick.  

If you have any tricks or tips for removing seeds, we would love to hear about it. Send us a message through Facebook, Twitter or Instagram or an old-fashioned email.