Making Tomato Sauce

Making food from scratch can take time. One of the main reasons busy people don’t make food from scratch is this time commitment. 

But, there is a way to fit home made food into a busy schedule. Here’s an example of how we did homemade tomato sauce in several stages to fit our schedule. 

Think in small batches

Almost no one has an entire day to devote to processing a large bunch of produce and completing it all in one day. If you do find yourself with a free Saturday and bushels of tomatoes, these steps can all be crunched into one day. That is a rarity for us, so breaking it down into small steps is a necessity.

Pick the tomatoes

  
Don’t plan to do anything else. Just pick tomatoes. Tomatoes will keep at room temperature for 3-4 days depending on the ripeness when picked. It is ok to pick a bit underipe and finish on a window sill or kitchen counter. 

Peel and seed.

Prepare a pot of simmering water and a pan or sink of ice water. Drop the tomatoes in the simmering water for 30-45 seconds, then plunge into the ice bath. Skins will slip off easily. Slice the tomatoes in half horizontally, squeeze out the seeds (sometimes it helps to dig them out with your finger), cut out the core, and quarter the tomatoes. Unless you are sensitve to tomato seeds, it is not necessary to get out every single seed. Cover and refrigerate the tomatoes for up to 2 days. 

Sometimes we stretch this step out over a couple of days if needed to get all of the tomatoes peeled, seeded and cut. 

Season and bake.  

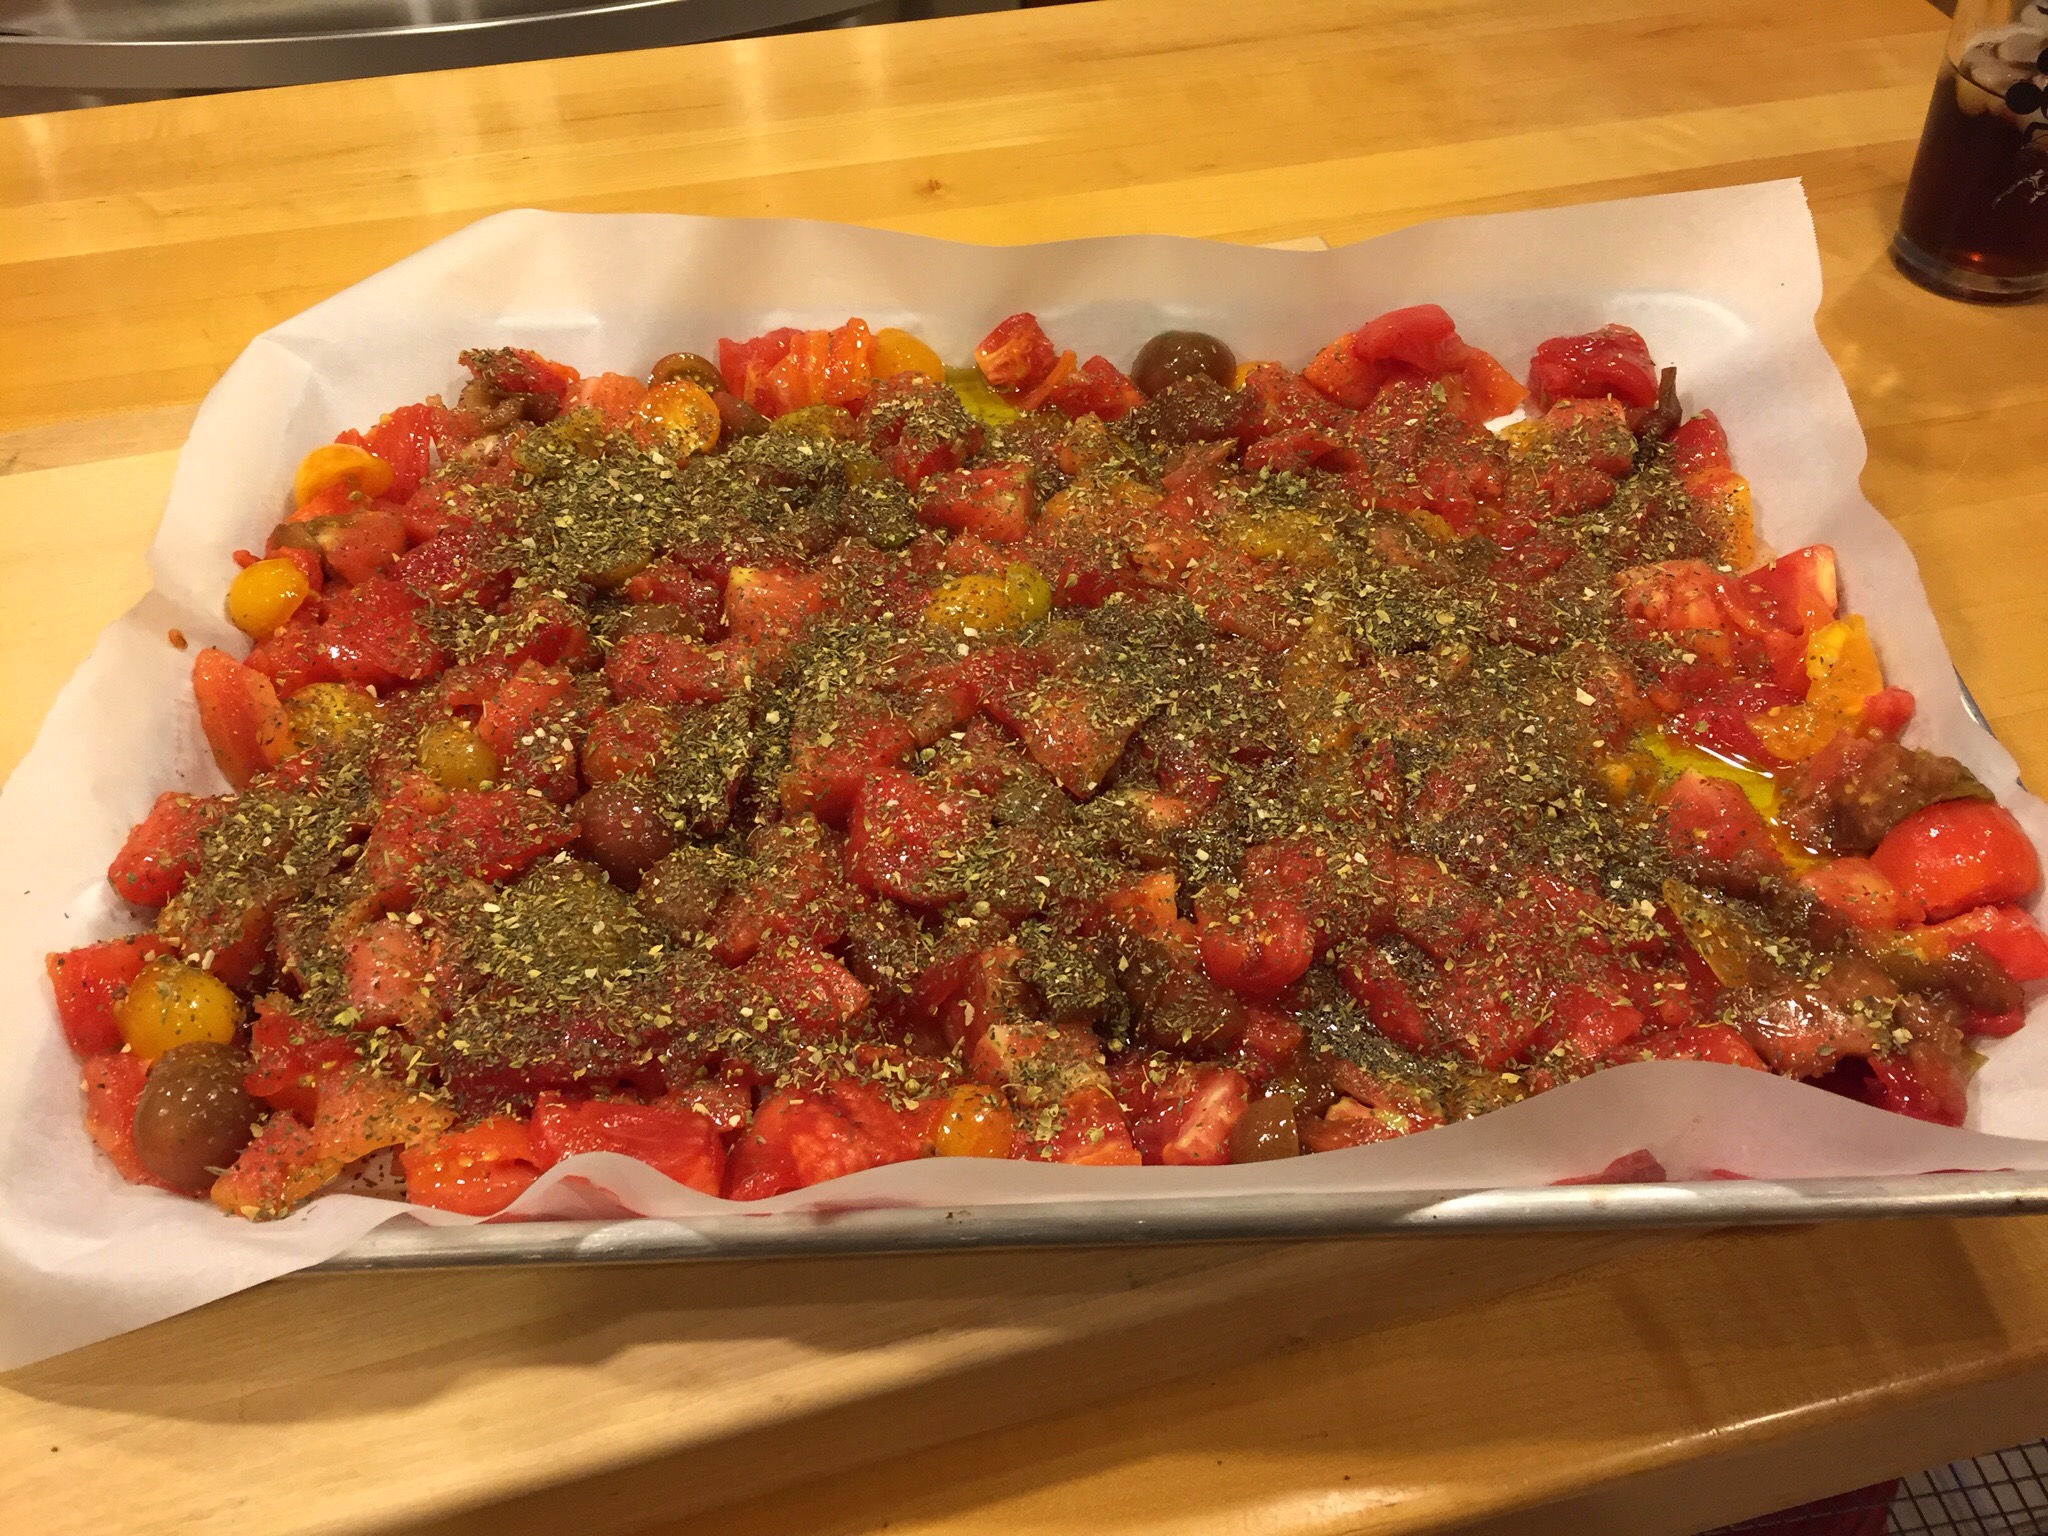
 Yes, bake. Line a shallow baking pan with parchment paper, place tomato quarters in a single layer and drizzle with olive oil. The amount of olive oil is personal preference. At Five Feline Farm, a full baking sheet gets about 1/3 cup of olive oil. Then sprinkle with your favorite Italian herb seasoning. We like strong flavors, so we use 2-3 Tbsp. 

If you have a convection oven, convection bake at 300º. If you do not, bake at 325º, and expect about a half hour longer. Stir every hour until the tomatoes are cooked through and most of the juices have cooked off. In the convection oven this takes about 2 hours. 

This step sounds like a long time, but the actual active involvement is 15 minutes or so. In between stirring you can relax, watch TV, eat supper, or work on another household task. As a bonus, the aroma wafting from the oven is heavenly. 

After baking, pour the tomatoes into a storage bowl and refrigerate. This will hold in the fridge another day or so until you have time for the next step. 
Blend and store.


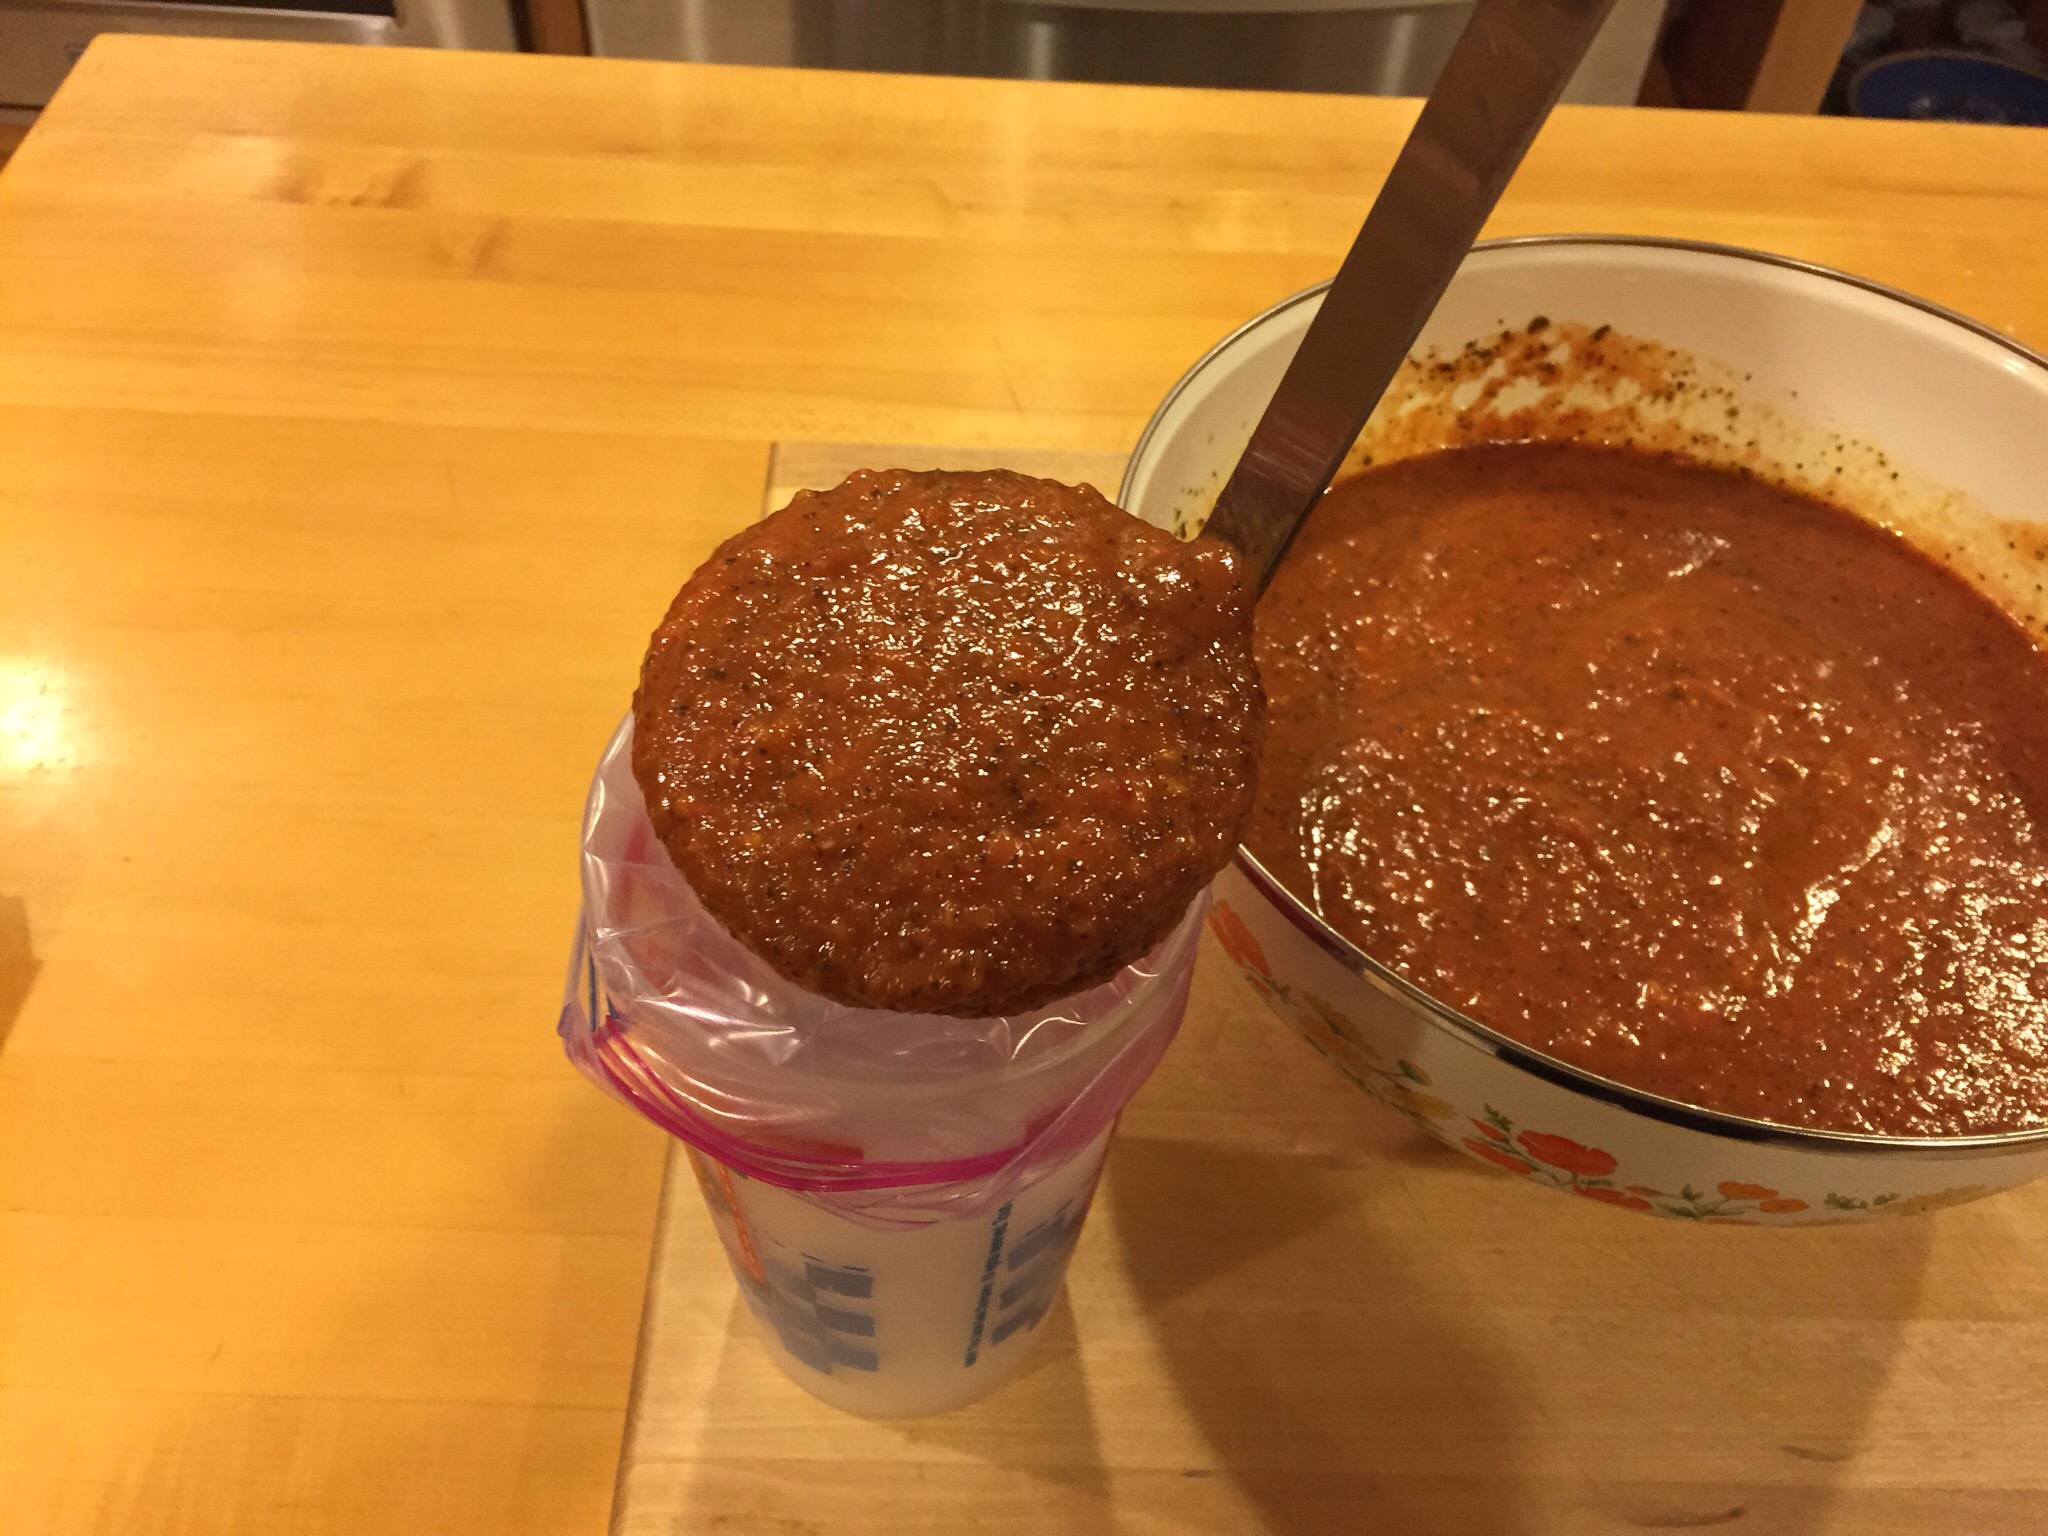
Use an immersion blender to quickly blend the baked tomatoes into a thick sauce. If you don’t have an immersion blender, you can use a regular blender or food processor; however immersion blenders are fairly inexpensive and so versatile that this is really the way to go.

After blending, ladle into freezer baggies, seal and store. We typically freeze in 1 cup portions. 

When ready to use, the sauce can be thawed in the refrigerator, defrosted in the microwave and added to a recipe or thoroughly heated in the microwave. You will be tempted to eat straight from a spoon.

If you are reading this in email, thank you for being a faithful subscriber. For those of you who are on our website or connecting through Facebook/Twitter channels and would like to have posts delivered to your inbox, it’s easy to subscribe. As a bonus you’ll get a free ebook “Wisdom of the Bees”.

Winter Preppers

Yes we are prepping.

Not the kind of long term stockpiling that most people think of as prepping. Not building bunkers anticipating a nuclear holocaust.

We are prepping for winter.

There are things that you must consider living in the country. Each year we learn another lesson. We may or may not have power. The road to town may be impassable. So, we need to be prepared. That’s what prepping is after all. A state of preparedness for whatever life or the elements may throw at you.

Photo Nov 16, 2 38 33 PM

Winter 2015 Prep List

1. Power

At Five Feline Farm we have upgraded a few things to help us through the winter. First and foremost was installing a whole house generator. Winter storms taught us that power is a critical element. It has been frightfully cold when the power has been out for hours or days at a time.

We have no plans to go off grid, but we do now have a back up plan for power outages. Even though the generator and 500 gallon propane tank should keep things fully functional for a week, we will still go into conservation mode. A few lights. The refrigerator and freezers. Water heater. Lower the thermostat. Doing all of this will extend the tank of propane for as long as possible. The supplier states they can get us a refill within two days of calling, but if the road is drifted shut, that may be an optimistic estimate.

2. Food

Summer’s bounty plus a few items from the store are stocked. The pantry is loaded with canned goods. The freezers are packed with meat and vegetables. We may need to get creative with meals, but we could easily manage a month or more of keeping body and soul united.

3. Outside Chores

Set up the Christmas decorations. Yes, you read correctly. It is much nicer to set up the outside decorations in early November before the weather gets brutal. There is no need to turn everything on, but at least it is ready at the flip of a switch. This isn’t rushing the season. It is being planful.

Winterize the camper. Bring in the pond pumps. Drain the water hoses. Mow down the garden. Put the snowplow on the Mule. These are just a few of the outside tasks that need to be completed before a freeze.

At this writing, the first flakes of winter snow are falling. It is good to have the winter prepping completed. We can sit back and enjoy the beauty of winter without worry.

What winter prepping have you done? We’d love to hear from you in the comments section.

Don’t forget to get your free copy of “Wisdom of the Bees”, an ebook exclusive to members of our email list. Sign up is easy and we’ll never spam you. Just great content and special offers from Five Feline Farm. 

Threshing Wheat

Does anyone this day and age spend their Sunday afternoon threshing wheat? Probably not.

Last Sunday at Five Feline Farm, we did. At least we made a good start.

This wasn’t a massive operation. More of an experiment. What if we could grow and harvest enough wheat to make a loaf of bread? What would that taste like?

The process started last fall with planting hard red winter wheat. Stalks were harvested two weeks ago and dried in the greenhouse. Conditions are perfect inside the greenhouse during the summer for drying things. It is well over the outside temperature and protected from the elements.

Next the heads of grain were removed from the stalk and gathered in a large bucket. Now, how to get the grain out? First try was rubbing the heads between our palms. That worked, but too slow. Plus after a short time, it was irritating to the palms. Next attempt was placing a few handfuls into an old pillow case and beating it with a coat hanger. That also worked. A bit faster than by hand, but still too slow.

IMG_0481.JPG

The final effort was placing all of the heads of grain in a bucket and stirring rapidly with a wooden rod. Success. In a relatively short amount of time, most of the wheat kernels were free from the heads.

The job is not finished. The next step is to set up a fan and pour the grain from one container to another while the fan blows out the chaff. A good windy day is useful for this purpose as well.

IMG_0482.JPG

Hopefully the end result will be enough wheat to grind into flour for bread. How could this not be delicious and oh so healthy?

More to come on the grinding and baking.