Blog

Butter

Enjoy this repost from 3 years ago. It is just as true today as it was then.

I love butter. Smooth, silky, creamy butter. There is nothing like it to transform pan sauce into a glistening, slightly thick, lip-smackingly rich perfection.

The butter in our house can be found in not one, not two, but three locations.

Butter on the Counter

Softened butter occupies a place of honor on the counter. Kept fresh in a butter keeper, ready to spread at a moment’s notice.

Soft Spreadable Butter

Butter in the Fridge

There are packages of butter awaiting use in the refrigerator, stick by glorious stick.

Butter in the Freezer

And there is always butter in the freezer. Usually purchased 16 or 20 pounds at a time. Butter stores perfectly well in the freezer. I can’t chance running out.

I preserve herbs in butter, making logs of rich herb butter to freeze. Later sliced and added to everything one can imagine. See how that process works in Making Herb Butter.

Oh, I know what you’re thinking.

“Her arteries are so clogged with all that butter fat, there’s no oxygen to her brain.”

“Bet her blood flows thick as frozen butter.”

“Cholesterol must be off the chart.”

The low-fat movement is surely having a stroke about now.

Yes, I use a lot of butter. Along with all the other full fat ingredients.

I’ve stopped using canola oil, shortening, corn oil, butter substitutes, reduced fat milk and cheese. In my opinion these options are not healthy, whole food. Many are GMO laden or composed of unrecognizable ingredients. These are not the food that my grandparents knew and used. I have stocked my kitchen with organic coconut oil, avocado oil, extra virgin olive oil, full fat milk and cheese.

And butter. Lots and lots of creamy butter.

By the way, my cholesterol is down.

Garlic Scapes

Did you know garlic plants provide much more than just the part that is commonly available in grocery stores? It’s true. There is more to this fragrant plant than what comes in the papery bulb.

What Are Garlic Scapes?

Garlic scapes are the tender end of the shoot in hard neck garlic varieties. As the plant grows in springtime, it sends up a shoot that is tender at first and later turns into a flower with bulbils. Those tiny bits of the flower are also edible, but the scape is the newly forming flower with it’s white end and the first 5-6 inches of tender shoot. 

When To Harvest.

When the shoot has a whitish end that looks like a bloom is starting to form, the scape is ready. The green part may be curled back on itself forming a curly que at the very top of the garlic plant. Snap off the shoot approximately 4-6 inches below the tip just as you would asparagus. The plant will snap off at it’s tender point. 

How To Use.

Now that you have these spring delicacies, it’s time to use them in the kitchen. Scapes taste like garlic. The flavor is lighter than garlic cloves but still clearly garlic. One option is to dice and stir into any dish where you would normally use garlic. Scapes may be sautéed as is and eaten as a vegetable. You can chop it for a garnish on lettuce salad, use to flavor pasta salad, fry with potatoes or use in any dish where garlic will add a complementary flavor.

As an added bonus, snapping off the scapes will divert the plant’s energy into bulb development. So not only does the gardener get a fresh taste of garlic in the spring, the fall harvest will be improved.

If you grow your own garlic, give scapes a try. If you don’t and are in the Charleston area, stop by the 18th Street Farmer’s Market this Saturday and pick up some from us.

If you enjoyed this post, give us a shout out on any of our social media sites: Facebook, Twitter, or Instagram. We love to hear from our followers.


Do You Eat Flowers?

Have you ever eaten a flower?

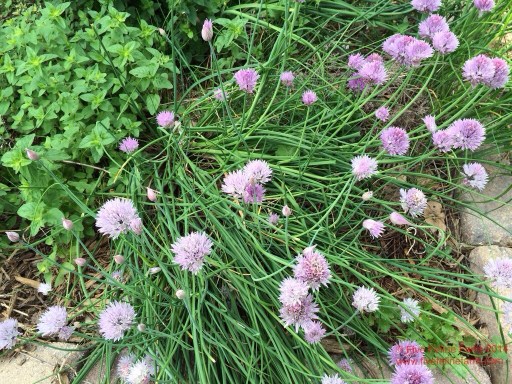
Many flowers are edible and if you are unfamiliar with eating flowers, start with chive blossoms. These light purple flowers are more than just a pretty decoration at the end of an oniony stalk. They are easy to pick and clean, plus beautiful in a salad, on potatoes or even just sprinkled around a plate for garnish.

To use, pick whole blossoms by pulling gently at the base of the flower to pop off the entire bloom. Give them a quick rinse and dry on a paper towel or drying rack. You can even use a salad spinner.

20140611-233002-84602414.jpg

After most of the bloom is dry (don’t worry about every drop of water evaporating), grasp the stem end in one hand and pluck out the tiny blossoms with the other. These individual blooms will pull out several at a time.

20140611-233058-84658661.jpg

Then add to your favorite dish. Like potatoes grilled in foil. With melty cheese.

What flowers do you eat?

Asparagus Quiche

Asparagus

Asparagus is a tender, delicious vegetable and its spring appearance after the long winter makes it a special treat. 

One of my favorites ways to use asparagus is in a quiche. The name sounds fancy but it is easy to make. There is no limit to the combinations of vegetables, meats or cheeses that can be used, but this version highlights fresh garden asparagus and chives. 

As a bonus it reheats well, so provides lunch for a couple of days.

For a 9 inch quiche

1 pie crust

5 large eggs

1-1/2 cups half and half or milk

1 cup of asparagus, cut into thin rounds

1 cup shredded swiss cheese

1/4 cup minced fresh chives, plus 3 long pieces for garnish

Salt and pepper to taste

Pie crust is quickly made by mixing 1 cup flour and 1/2 tsp salt. Cut in 1/3 cup shortening. Stir in water one tablespoon at a time until the dough comes together into a ball, cleaning the sides of the bowl. Handle as little as possible, kneading only 2 or 3 times to make a smooth ball. Roll into a circle larger than the pie pan and transfer the crust into the pan. Prick the crust or use pie weights to keep the crust from puffing and pre-bake for 10 minutes in 375º oven. (You can use a pre-made crust, if desired.)

Evenly distribute asparagus, cheese and minced chives over bottom of crust. Mix eggs, half and half, salt and pepper. Pour over the filling being careful not to overflow the crust. Add long pieces of chives in a decorative pattern on top.

Bake at 375º for 30 to 40 minutes until the eggs are set and the top lightly browned. Let cool slightly and cut into wedges for serving. 

Pair with a crisp green salad fresh from the garden and a glass of chardonnay. 

If this recipe intrigues you, check out my book Simply Delicious. Part memoir and part cooking instruction, this is how I cook.